If you’re pretty much conversant with two-factor authentication (2FA), it’s very likely that you have an idea of how Google Authenticator works.
By and large, Google Authenticator is a free-to-use app that equips your account with optimum security. If you’ve fallen victim to the security drawback of SMS-based 2FA, chances are that you’re in dire need of the sort of protection that Google Authenticator offers.
With the help of Google Authenticator, you can save yourself the security headache associated with receiving “secret” codes via SMS. The Google Authenticator app is available for download on both Android and iOS device platforms. With this, it’s pretty easy to set up the app on Android and Apple phones.
⇒Join us on Telegram for more Sure and Accurate football-winning tips every day...click here
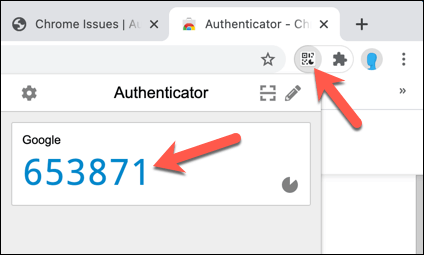
Unfortunately, the app is not yet available for desktop devices but if you’re keen to set up Google Authenticator for your PC, rest assured that there are a couple of trusted third-party authenticators out there.
On the one hand, this post guides you on how to set up Google Authenticator on your Android smartphone. The post, on the other hand, walks you throw how you can use WinAuth (a kind of third-party authenticator) in setting up Google Authenticator for your PC.
How to Set up Google Authenticator on Your Android Smartphone
- Head over to the Google Play store on your smartphone and input “Google Authenticator” in the search widget
- Select Google Authenticator from the emerging search results
- Download and install the Google Authenticator app
- Then, sign in to your Google account and navigate to the “Security and Sign-In” tab –this is where you’ll have to activate two-step verification within the account
- Click the “Two-Step Verification” button and from the options provided, choose the Authenticator app option
- In the subsequent “Get codes from the Authenticator app” window, specify your device platform. This could be any of Android and iPhone (Note that doing this will enable your smartphone to receive verification codes from the app. These codes are free and you don’t need any internet connection before you can receive them)
- You’ll have to tick the Android side since you’re using an Android phone
- Then, launch the Google Authenticator app you installed earlier
- Scroll to the top screen of the app and select the “+” icon
- Now, you’ll be provided with two options from which you’re to select one
- The two options are “Scan barcode” and “Manual entry” just as seen down the app screen (We recommend that you choose the “Manual Entry” option since it requires less time compared to the “Scan barcode” option. If you select “Manual Entry”, you’ll receive a 16-digit code. You’ll need this code for completing the verification just after having received the code in your email address. If you however choose the “Scan barcode” option, you’ll have to connect your Google account with the Google Authenticator app using a QR scanner. This process necessitates scanning a QR code and will likely seem tedious)
- In using the “Manual Entry” option, you’ll have to supply the 16-digit code sent to you and then enable the “Time-based” option
At this point, you’ve successfully connected the Google Authenticator app with your Google account. So, when you sign in to the account, you’ll have to attempt the 6-digit authentication process by providing a verification code. This 6-digit verification code is randomly generated by the Authenticator app. After your login (to the Google account), simply head over to the Google Authenticator app and you’ll find the 6-digit verification code therein. (Note that you’ll need a recently generated 6-digit code from the app and this is why you were required to enable Time-based in the “Manual entry” window earlier on)
How to Set up Google Authenticator on Your PC

The official Google Authenticator app is not yet available for desktop devices but this doesn’t mean there isn’t an alternative route for setting up Google Authenticator for your PC.
Basically, you’ll have to obtain Google Authenticator’s secret key (from the Google Account security page) and then insert the key in a safe third-party app such as WinAuth. Follow the steps below to set up Google Authenticator on your Windows PC:
- Foremost of all, click the link hereto generate Google Authenticator’s secret code
- Once you land on the account security page, navigate to “Signing in to Google”
- Select the 2-Step Verification option
- In the course of setting up Google Authenticator on your PC, you’ll need to activate Google’s phone notification service. Provided one of your smartphones is connected to your Google account, Google will likely recognize this and thereupon show you how to set up the notification service
- Once you’ve successfully activated the phone notification service, you can then proceed to set up the Authenticator app (for your PC)
- In the window that emerges next; where you’re required to verify that it’s you by adding more second steps; select the SET UP button under the Authenticator app option (It might seem like you’re trying to download the app but actually, you aren’t. All you need is the secret key for setting up the Authenticator app via a third-party app)
- Comply with the subsequent instructions till you’re taken to the QR code window. Although you’ll be prompted to scan the QR code, you’ll actually have to select the CAN’T SCAN IT button beneath the code
- Subsequently, you’ll find the secret key for setting up Google Authenticator on your PC. Copy this key and make sure it doesn’t get known by others. The key is very sensitive as it could be used to access your account
Just as noted earlier, WinAuth is a safe and reliable third-party app via which you can set up Google Authenticator for your desktop device. You don’t want your secret key (for Google Authenticator) to get leaked and this is why we recommend that you opt for WinAuth.
To use WinAuth for setting up Google Authenticator on your PC, download the WinAuth app and follow the steps below:
- Launch the downloaded WinAuth app and within the app, select the “Add” button
- From the emerging options, select Google in order to add a new Google account
- Now, you’ll be provided with a field into which you should input your secret key
- After that, select Verify Authenticator
- WinAuth will help you generate a code –precisely an OTP –that you have to copy
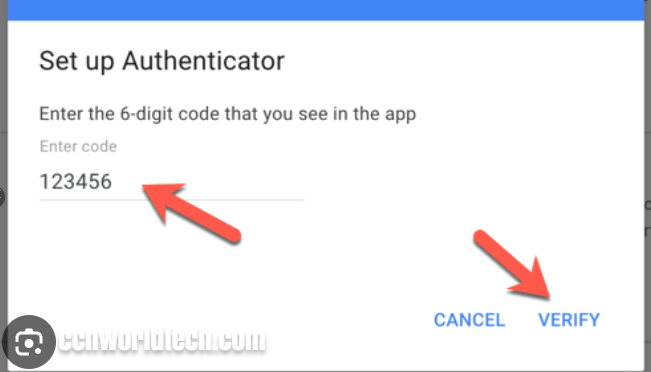
- Now, you’ll have to proceed with your Google account setup by pasting the copied code in the Code field of your Google security settings page. Additionally, you should verify this code by selecting the Verify and Save button just after inputting the code
- Now, you’re certain to have successfully set up Google Authenticator. Confirming this, the next window indicates that you had a successful configuration of your Google Authenticator app (Note that WinAuth was meant to serve as your Authenticator app since the official app –Google Authenticator –is not yet supported on desktop devices)
- Importantly, you should save this configuration for your Google account by clicking the OK button within the confirmation window
- At this juncture, you’re done with the verification of the WinAuth-generated code and what you need now is saving the changes in WinAuth
- Click OKin the WinAuth window
- The next screen presents the Protection window which helps you beef up the security of your authenticator. Doing this saves you the risk of losing sensitive data to computer malware. To use this protection, you’ll have to set up encryption for your authenticator. In the WinAuth Protection window, you’re allowed to use either of two encryption modes –the first one is with your password while the second one is with a built-in feature for account encryption. While the first encryption mode seems more suitable, it lets you use a self-defined password for encrypting WinAuth (files). This way, you’ll always require this password for accessing WinAuth. The second encryption mode restricts the use of WinAuth to your current computer, making it difficult to use WinAuth (or its files) on a different computer
The information above is all you need for setting up Google Authenticator on your PC via the WinAuth app. If you accurately follow all the steps outlined in the information, you’ll find it easy to use WinAuth for Google Authenticator’s setup on your desktop device.
Conclusion
Whether you’ve come under SMS-based attacks before or not, the protection offered by Google Authenticator is something you should consider essential for sensitive online accounts including your e-mail account.
Also, it is noteworthy that our choice of WinAuth (as the third-party app for setting up Google Authenticator on your PC) is due to the high-grade security it offers. Although there are other third-party apps that can serve just that purpose, WinAuth is clearly a proven authenticator app. If, for one reason or the other, you’re unable to use WinAuth, we’d advise you to look the way of any option among the following third-party authenticators: Authy, WinOTP Authenticator, GAuth Authenticator, and 2 Factor Authentication.
Hopefully, this post has successfully walked you through the steps for setting up Google Authenticator on your Android phone and your PC.
References:
https://www.google.com/amp/s/mashable.com/article/how-to-set-up-google-authenticator%3famp
https://www.google.com/amp/s/www.maketecheasier.com/google-authenticator-windows/%3famp


